01
Size
10 × 15 ftConfirm that the organizer or venue allows the wider rectangular footprint.
More room without a full 10×20 footprint
Create more room for product displays, staff interaction and branded event activities with a 10×15 custom advertising tent. Configure the canopy, walls, graphics and supporting event products around your project requirements.
Compare the complete setup in Build Your Tent SetupSpecification-led quotation · No published price or unsupported performance claim
Direct answer
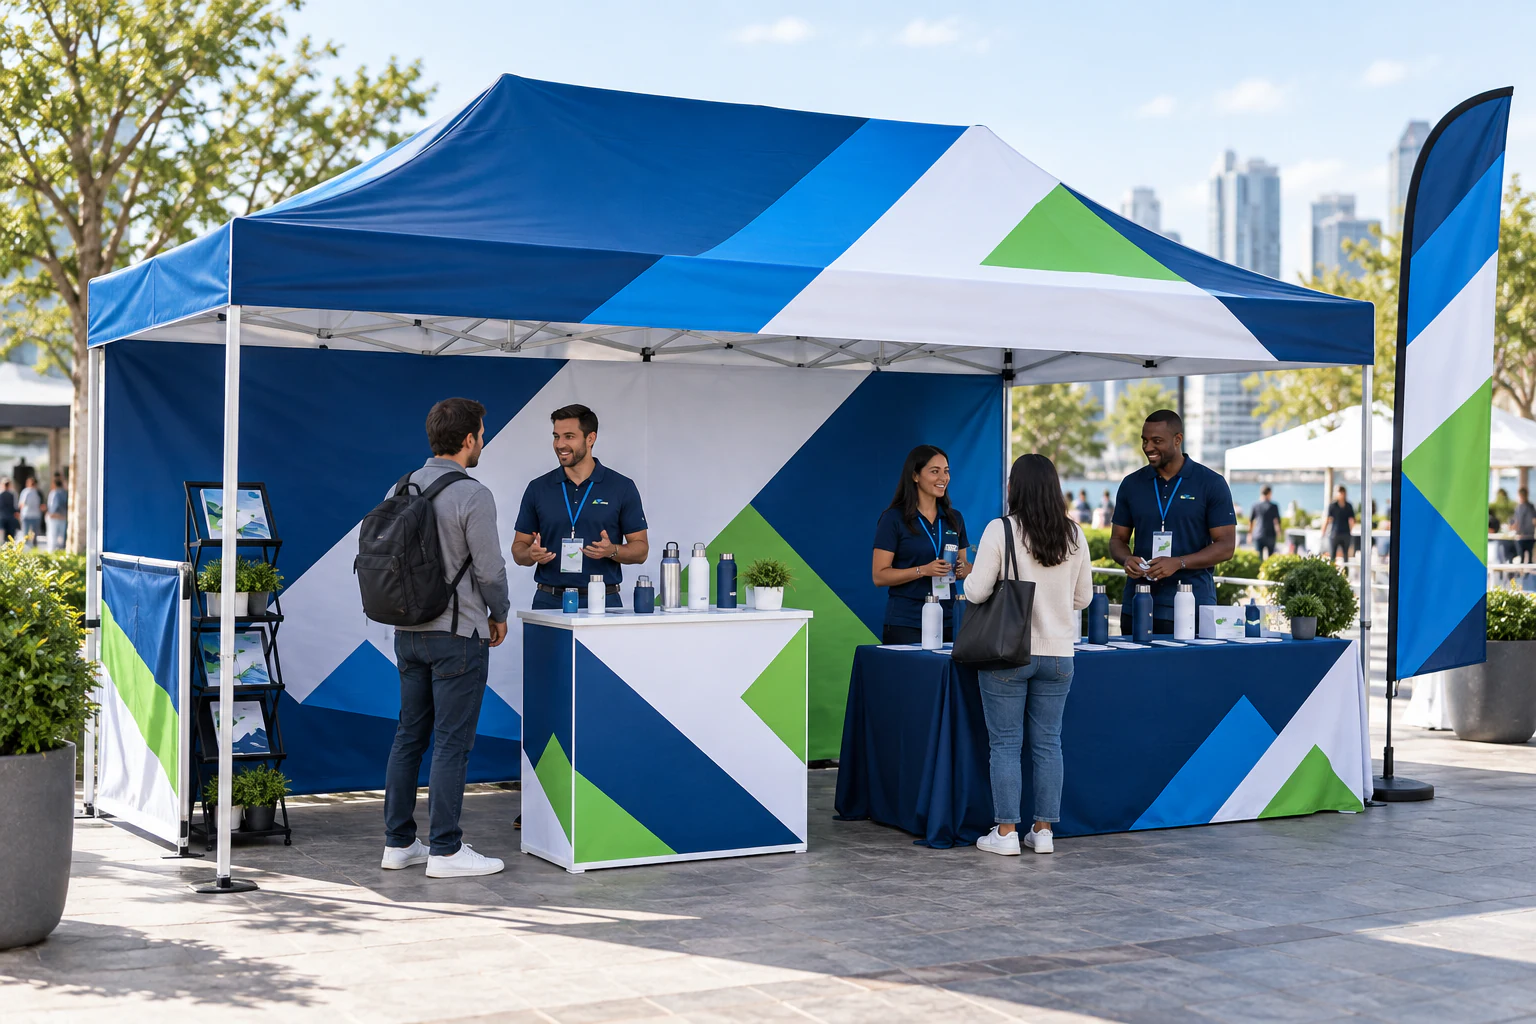
Choose a 10×15 custom tent when a compact 10×10 footprint does not provide enough working or display space, but the project does not need a full 10×20 setup. The wider event footprint can support product demonstrations, sampling, retail activations, sports events and trade shows while coordinating the canopy, walls, custom flags, table covers, displays and promotional products as one XZD Branding project.
Quick product configuration
Use these choices to define how the additional width should work for the event. They organize a tailored quotation and do not represent pricing or a guaranteed standard package.
Confirm that the organizer or venue allows the wider rectangular footprint.
Prioritize the surfaces visible from the main visitor approaches.
Balance access, graphic coverage, presentation and internal zoning.
Share current brand assets, sponsor files and placement references.
Describe the activities that need to happen within the branded space.
Coordinate surrounding products through the same project brief.
Size decision
The 10×15 format is an intermediate event footprint: it gives the project more room to organize displays, activities and conversations without moving directly to a 10×20 canopy.
Gain additional room beyond a 10×10 footprint for event tasks, materials and visitor-facing activity.
Arrange products, counters or displays with more separation than a compact square booth allows.
Give staff and customers more room to hold conversations alongside the main display or activity.
Plan a demonstration or sampling point without making it the only function inside the tent.
Separate welcome, product, demonstration, staff or giveaway areas conceptually within the wider footprint.
Connect the canopy with flags, tables, displays and promotional products around one event plan.
Footprint comparison
The main difference is how much event activity the footprint needs to support. Choose by working space and layout priorities, not by an assumed attendee capacity.
| Decision factor | 10×10 custom tent | 10×15 custom tent |
|---|---|---|
| Event footprint | Compact square footprint for space-sensitive event plans. | Intermediate rectangular footprint with additional width beyond 10×10. |
| Working space | Best for one focused booth function or a tightly organized setup. | Provides more room to separate working, display and visitor-facing activity. |
| Typical application | Registration point, compact booth, sampling station or team base. | Product demonstration, retail activation, sports event or wider promotional booth. |
| Display flexibility | Supports a concise display plan where every element shares a compact zone. | Allows products, counters and displays to be arranged with more visual separation. |
| Team interaction | Suited to a compact staff and visitor interaction point. | Makes it easier to plan staff conversations alongside demonstrations or displays. |
| Supporting products | Coordinate selected flags, a table cover or a focused backdrop around the booth. | Coordinate flags, tables, displays and promotional products across a broader setup. |
| When to choose | Choose when event space is limited or the project requires a compact branded booth. | Choose when additional working or display space is needed without a full 10×20 footprint. |
Choose 10×10 when compact footprint is the priority. Choose 10×15 when you need additional room for displays, demonstrations or staff interaction while keeping the event setup relatively compact.
Conceptual space planning
Treat the wider footprint as a flexible branded workspace. The zones below show one conceptual way to organize event functions; they are not a fixed floor plan or a capacity statement.
Create a clear first touchpoint for visitors entering from the priority event side.
Give featured products or campaign materials a defined visual area.
Set aside working space for a live explanation, trial or sample handoff.
Reserve a practical zone for project materials and staff coordination.
Position branded bags, apparel or giveaways around the visitor journey.
Zone sizes and positions should be adapted to the tent walls, furniture, visitor access and event rules.
Branding and printing areas
A 10×15 custom printed tent can distribute the main logo, campaign graphics, sponsor graphics and brand colors across the canopy, valances and selected walls. The wider setup also creates more opportunity to coordinate the tent with custom flags, table covers, displays and promotional products.
Printing and fabric direction depend on the selected canopy, wall panels, artwork and project specification. No single print method is presented as universal for every configuration.
Wall configuration
Wall choices affect how visitors enter, where graphics are presented, how products are framed and how the wider footprint is divided into functional event areas.
Keep every side open when visitor access and an unobstructed view of the activity are the priorities.
Use a rear graphic surface to anchor product presentation while keeping the visitor-facing area open.
Add one side boundary to frame a display, direct entry or organize a working area.
Create a more defined interior when the event layout needs a clear front-facing approach.
Mix open access with selected full or half walls around demonstrations, counters and displays.
These are planning configurations, not guaranteed standard package contents. Confirm the required walls, access and graphics in the RFQ.
Compatible system options
These accessory families are useful planning prompts, not a universal included kit. Compatibility and included contents are confirmed against the selected frame, canopy and wall system.
Choose the required access and graphic coverage first, then confirm each wall panel against the selected canopy and frame.
Treat openings as model-specific wall variants; confirm panel construction and compatibility before quotation.
Describe the installation surface and venue requirements so the applicable anchoring or ballast direction can be reviewed.
Use only where the exact adjacent tent models and frame profiles are confirmed compatible.
Confirm the carry bag or case and packed format for the selected frame, canopy and wall set.
Match a replacement canopy to the exact frame model, dimensions and attachment system rather than the nominal footprint alone.
No wall, anchoring item, gutter, connector, bag, case or replacement canopy is represented as included until the exact configuration is confirmed in the quotation.
Frame and fabric considerations
Choose the frame and fabric direction by reviewing the event application, expected frequency of use, transport requirements, wall setup, event environment and overall project requirements. A custom 10×15 pop up canopy should be confirmed as a complete configuration rather than selected from one material detail alone.
Review the intended graphics, selected walls and event conditions together before confirming the fabric direction for the project.
The appropriate frame direction depends on how the tent will be used, moved, configured and coordinated with the rest of the event setup.
No wind, waterproof, fire, UV, warranty or other performance rating is stated for this page. Request the applicable project documentation before relying on a technical property.
Event applications
A 10×15 branded canopy is most useful when the event plan needs more than one compact activity or a clearer division between display, demonstration and conversation areas.
Use the additional width to separate a demonstration surface from visitor conversation or product display.
Create a wider branded environment for a feature display, customer interaction and campaign materials.
Organize a sponsor, team or participant touchpoint with room for displays and event support items.
Explore solutionPlan the sampling handoff alongside product information, staff discussion and promotional products.
Coordinate a professional welcome point, display area and branded materials within one canopy.
One event. One coordinated brief.
Coordinate the tent and the products around it through one project brief so the event branding, display surfaces and promotional items can be reviewed together.
Share the 10×15 tent, flags, table cover or counter, backdrop or display, promotional bags, giveaways and apparel requirements in one coordinated sourcing brief.
Build My Event PackageArtwork guide
Organize the available logo, vector artwork, brand colors, wall graphics, sponsor logos and placement instructions before quotation. Reference files support review, but not every file is automatically production-ready.
Choose Artwork for My ProjectProvide the clearest approved master logo files available for placement review.
AI, EPS, SVG or vector PDF files are useful references when available.
Include Pantone references or other current brand-color information.
Separate artwork intended for the back, side or half-wall panels.
Supply current sponsor assets and explain the intended hierarchy.
Mark preferred roof, valance, wall and supporting-product positions.
Share sketches, event photos or previous layouts that help explain the activation.
Project workflow
A compact view of the project stages. The applicable confirmation, production and fulfillment details are established for the individual brief without implying a fixed lead time.
Share the application, quantity, timing and destination.
Define the 10×15 footprint, walls and supporting items.
Provide logos, colors, graphics and placement notes.
Align the selected components with the project requirements.
Check the consolidated scope before moving forward.
Proceed through the stages agreed for the project.
Plan delivery around the confirmed date and destination.
Buyer specification checklist
Prepare the details that define the size, configuration, graphics, timing and supporting products. If an item is undecided, explain the event application so it can be discussed during project review.
Get 10×15 Tent QuoteTotal tents and whether the graphics change between units.
Demonstration, retail activation, sports event, sampling, trade show or promotion.
Confirm the required 10×15 ft footprint against organizer or venue guidance.
Roof only, back wall, side walls, half walls or another access-led layout.
Logo, campaign graphics, wall artwork, sponsor files and placement notes.
Pantone references or other approved color information.
The date the branded tent and event setup will be used.
The requested arrival date for event planning.
Country, city and available venue or receiving details.
Flags, table covers, counters, displays, bags, giveaways or apparel.
10×15 tent FAQs
Direct answers about choosing the intermediate footprint, organizing graphics, preparing artwork and coordinating a complete branded event setup.
A 10×15 custom advertising tent is a rectangular branded event canopy with a nominal 10 ft by 15 ft footprint. It provides more working and display space than a 10×10 booth while remaining smaller than a 10×20 setup, with canopy, valance and wall graphics reviewed for the chosen configuration.
Choose 10×15 when you need additional room for displays, demonstrations, sampling or staff interaction but do not require a full 10×20 footprint. Choose 10×10 when keeping the branded booth as compact as possible is the main priority.
Yes, printed back walls, side walls and half walls can be considered where the selected configuration supports them. Explain the required visitor access, product presentation and graphic coverage so the wall direction can be reviewed in the quotation.
Branding can be planned for the canopy roof, front and side valances, back wall, side walls and half walls, depending on the confirmed configuration. Use the artwork brief to identify logo placement, campaign graphics, sponsor graphics and priority viewing directions.
Yes, a 10×15 event tent can be useful for a product demonstration because the wider footprint can separate the working surface from display and visitor conversation areas. The final layout should follow the product, furniture, access and event requirements.
Yes, XZD Branding can review custom flags, table covers, counters, displays, promotional bags, giveaways and apparel as part of the same event project brief. Shared logos, campaign graphics and color references help connect the complete setup.
Provide the logo, vector artwork when available, brand colors or Pantone references, wall graphics, sponsor logos, placement instructions and useful reference images. Reference files support review, but not every file is automatically production-ready.
Provide quantity, event application, the 10×15 size requirement, wall configuration, artwork, brand colors, event date, required delivery date, destination and supporting products. If a detail is undecided, describe the planned use so the configuration can be discussed.
Start with the event brief
Share the quantity, event application, 10×15 size requirement, wall configuration, artwork, brand colors, event date, delivery destination and supporting products for project review.