01
Tent size
10 × 10 ft / 3 × 3 mConfirm the organizer-approved event footprint.
Compact branded event footprint
Create a focused 10 ft × 10 ft event space for exhibitions, sports programs, registration points, sampling and local brand activations. Plan the canopy graphics, wall layout and supporting products as one coordinated project.
Compare the complete setup in Build Your Tent SetupSpecification-led quotation · No published price or unsupported performance claim
Direct answer
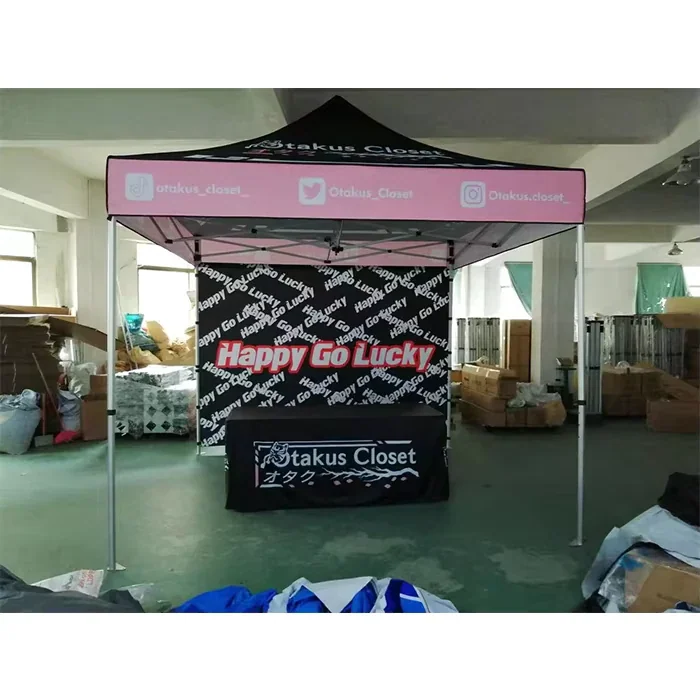
A 10×10 custom advertising tent, also described as a 10×10 custom canopy or branded 10×10 tent, is a compact 10 ft by 10 ft, commonly 3 m by 3 m, event space for a booth, registration point, sampling station or team base. Buyers can plan roof, valance and wall graphics, then coordinate matching flags, table covers and displays through the same project brief.
Quick product configuration
Use these choices as a buying guide. They organize the questions that should be confirmed for a tailored quotation; they are not a pricing configurator or a guaranteed standard package.
Confirm the organizer-approved event footprint.
Plan visibility from the priority viewing directions.
Use the front and side valances intentionally.
Add a backdrop when the booth needs a visual anchor.
Balance boundaries, display space and visitor flow.
Share vector files and reference layouts when available.
Identify the colors that matter to the campaign.
Coordinate the full event setup in one brief.
Size decision
A 10×10 tent is a useful starting point when a buyer needs a compact custom canopy, clear printed surfaces and a straightforward booth plan for one primary event function.
Create a defined branded zone where the organizer or venue provides a standard booth-sized area.
Use the roof, valance and selected wall panels to organize brand, campaign and sponsor graphics.
Map one main event function—such as registration, sampling or display—inside a focused footprint.
Pair the tent with matching flags, table covers, backdrops, displays and promotional items.
Branding and printing areas
XZD Branding connects custom advertising tents to event branding projects for trade shows, marathons, sports events and brand activations. The tent can then coordinate visually with flags, table covers, displays and promotional products.
Heat transfer, sublimation and screen printing may be considered as project directions. The appropriate printing method depends on the tent fabric, artwork and project configuration.
Wall configuration
Wall choices influence how visitors approach the booth, where campaign graphics are visible and how the compact footprint supports its main event function.
Keep every side open for approach, circulation and an accessible promotional counter.
Create a defined graphic backdrop while preserving an open visitor-facing side.
Add one side boundary for a display, message panel or more directed entry.
Use a rear wall and two side walls when the brief calls for a more contained booth.
Combine open access with selected full or half walls around the activity plan.
These are planning configurations, not guaranteed standard package contents. Confirm the required walls, access and graphics in the RFQ.
Compatible system options
These accessory families are useful planning prompts, not a universal included kit. Compatibility and included contents are confirmed against the selected frame, canopy and wall system.
Choose the required access and graphic coverage first, then confirm each wall panel against the selected canopy and frame.
Treat openings as model-specific wall variants; confirm panel construction and compatibility before quotation.
Describe the installation surface and venue requirements so the applicable anchoring or ballast direction can be reviewed.
Use only where the exact adjacent tent models and frame profiles are confirmed compatible.
Confirm the carry bag or case and packed format for the selected frame, canopy and wall set.
Match a replacement canopy to the exact frame model, dimensions and attachment system rather than the nominal footprint alone.
No wall, anchoring item, gutter, connector, bag, case or replacement canopy is represented as included until the exact configuration is confirmed in the quotation.
Frame and fabric considerations
Start with the event application, frequency of use, indoor or outdoor environment, transport requirements, footprint and wall configuration. The final material and structure should be confirmed for the selected project. When the chosen format uses a folding frame, buyers may also describe it as a custom 10×10 pop-up canopy.
Fabric weight, composition and coating remain tied to the selected canopy model. Cross-supplier examples are not presented as one combined option list.
Frame material and profile are confirmed together for one selected model. They are not mixed across supplier records.
No wind, waterproof, fire, UV, warranty or other performance rating is stated for this page. Request the applicable project documentation before relying on a technical property.
Event applications
The 10×10 format works best when the event plan gives the tent a clear purpose and keeps surrounding visitor movement, displays and supporting graphics in view.
Define a visible campaign point for demonstrations, sampling or customer conversations.
Organize a branded team, partner or participant touchpoint near the event activity.
Give check-in teams a recognizable covered base with coordinated event graphics.
Combine a compact canopy, product table and open visitor approach in one footprint.
Support sponsor, registration or team needs within a coordinated race-event system.
Explore solutionOne event. One coordinated brief.
Build more than a tent by coordinating the visual elements buyers commonly use around a branded booth or activation.
Share the tent, flags, table cover, backdrop, promotional products and apparel requirements in the same event-package brief.
Build My Event PackageArtwork guide
Organize the available brand assets before quotation so roof, valance and wall placements can be discussed together. Reference formats can help the review, but not every file is automatically production-ready.
Choose Artwork for My ProjectProvide the clearest master logo files available.
AI, EPS, SVG or vector PDF files are useful reference formats.
Include Pantone references or other approved color notes where possible.
Separate current sponsor assets and identify any required hierarchy.
Mark the intended roof, valance, back-wall and side-wall positions.
Share event photos, sketches or previous layouts that clarify the brief.
Project workflow
A compact view of the project stages. The applicable confirmation, production and fulfillment details are established for the individual brief without implying a fixed lead time.
Share the event, quantity, destination and timing.
Define the 10×10 footprint, walls and supporting items.
Provide logos, colors and placement references.
Align the selected components with the project brief.
Confirm the consolidated scope before moving forward.
Proceed through the stages agreed for the project.
Plan delivery around the confirmed date and destination.
Buyer specification checklist
Use this list to prepare a useful first brief for XZD Branding. If a detail is undecided, describe the event and the intended booth function so the options can be discussed.
Get 10×10 Custom Tent Quote10×10 ft / 3×3 m or the footprint specified by the organizer.
Total tents and whether artwork changes between units.
Trade show, sports event, registration, sampling or activation.
Roof only, back wall, side walls, half walls or another layout.
Logo files, campaign graphics, sponsor assets and placement notes.
Pantone references or other approved color information.
The date the branded setup will be used.
The requested arrival date for event planning.
Country, city and available venue or receiving details.
Flags, table covers, backdrops, displays, apparel or giveaways.
10×10 tent FAQs
Direct answers about footprint, graphics, wall choices, artwork and a coordinated event setup.
A 10×10 event tent uses a nominal 10 ft by 10 ft footprint, commonly discussed alongside the 3 m by 3 m size family. Confirm the exact site allowance and the selected tent dimensions in the project specification before ordering.
Printed back walls, side walls and half walls can be considered where the selected tent configuration supports them. Tell XZD Branding which sides need graphics and how visitors should enter so the wall direction can be reviewed as part of the quotation.
A 10×10 tent can be a practical choice for a compact trade show or exhibition footprint, especially when the plan centers on one counter, display or conversation zone. Check the organizer’s rules and indoor tent requirements before confirming the configuration.
Branding can be planned across the canopy roof, front and side valances, back wall, side walls and half walls, depending on the chosen configuration. Prioritize the viewing directions, message hierarchy and sponsor placement in the artwork brief.
Share vector logo files when available, brand colors or Pantone references, campaign copy, sponsor logos and placement instructions. AI, EPS, SVG, PDF and PNG can be useful reference formats, but not every file is automatically production-ready.
Yes. The project brief can include flags, table covers, backdrops, displays, apparel and promotional products alongside the tent. Supplying the same brand assets and color references helps the team review the event setup as a connected visual system.
Provide the tent size, quantity, application, wall configuration, artwork, brand colors, event date, required delivery date, destination and any supporting products. If a detail is undecided, explain the event use so the available configuration can be discussed.
Start with the event brief
Share the size, quantity, wall configuration, artwork, brand colors, event date, delivery destination and supporting products for project review.